How to Measure a Commercial Refrigerator Gasket Correctly
Measure a commercial door gasket in five minutes without ordering the wrong size, plus the two measuring conventions suppliers use and which one your quote needs.
Quick answer: Measure the gasket itself, not the door opening. For most snap-in and push-in commercial door seals, run a tape outside edge to outside edge across the gasket while it's still mounted. For gaskets like many True units, the correct number is dart to dart, the distance between the two flexible fins that snap into the door channel, not the outer lip. Mixing up the two conventions is the single biggest reason a kitchen orders a gasket that doesn't fit.
The Gasketeers measure commercial refrigeration doors every week across Boulder County, and the same mix-up shows up on reach-in coolers, prep tables, and walk-in doors alike. One supplier's spec sheet reads outside edge to outside edge. Another, including True's own published guidance, means dart to dart. Neither page tells you which one it's using, so this guide covers both conventions, shows how to tell which applies to your unit, and gives a script to ask a supplier directly.
What you need before you start
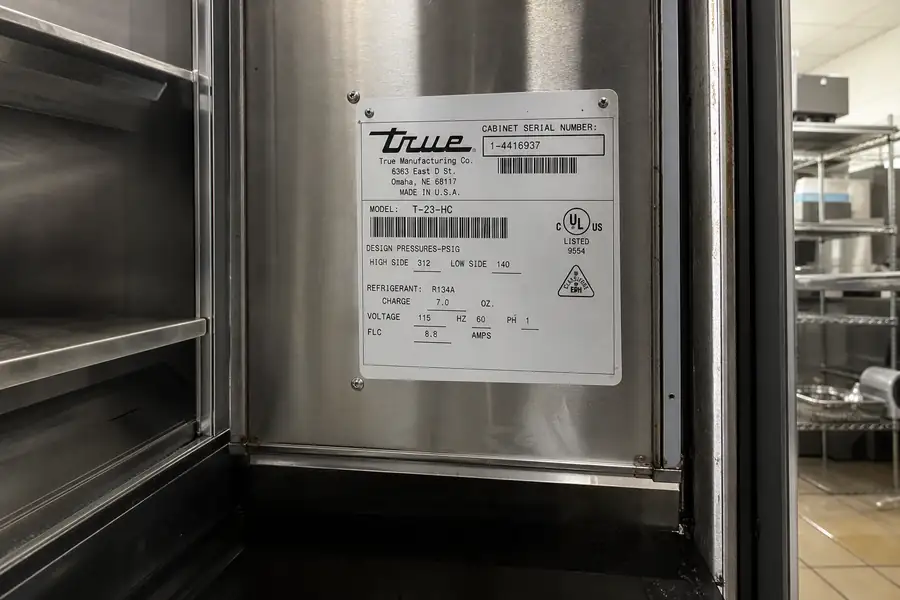
Gather four things before you touch a tape measure: a metal tape or rule, since fabric tapes stretch around a gasket's curve, a phone camera, the equipment's data plate or model number, and the old gasket if you're replacing one. Having the failed gasket in hand is the fastest shortcut, since the gasket profiles we stock and fabricate are cross-referenced by shape and mount type, not just by size.
Write down the brand, model number, and door count as you go. A prep table with two doors and a reach-in freezer with one door can share a similar-looking gasket that still isn't interchangeable.
Need a gasket replaced?
Call us or send your unit's model number. Free quotes across Boulder County, usually same week.
Step 1: work out whether your gasket is snap-in, push-in, screw-in, or compression
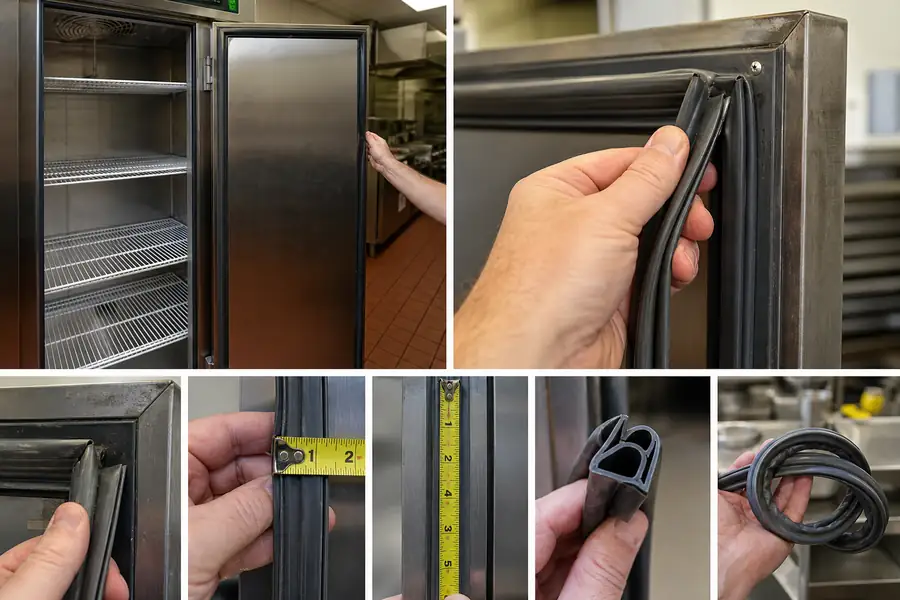
The mount type determines how you take the measurement, so identify it first. Run a finger along the inside edge of the gasket where it meets the door panel.
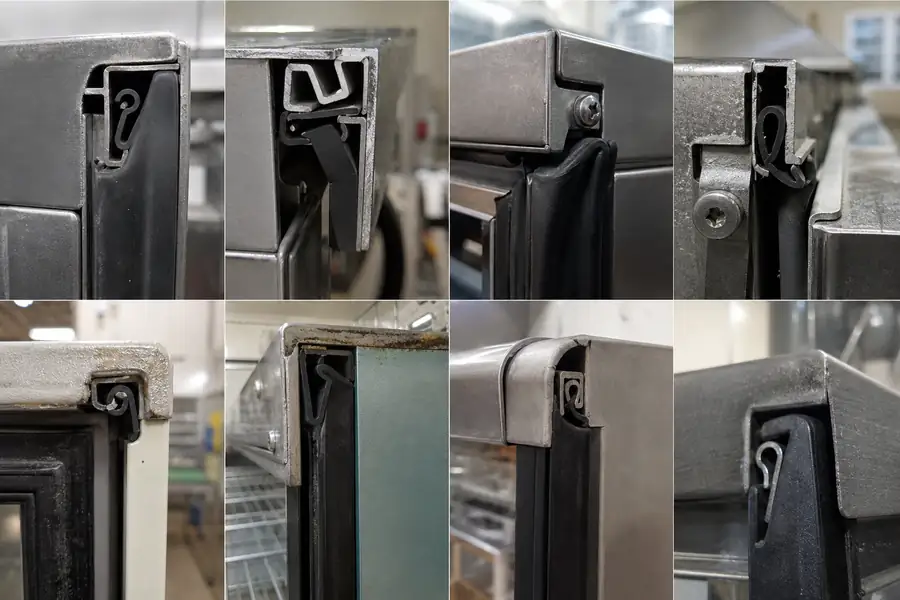
Snap-in: a flexible fin, or dart, tucks into a groove in the door panel. Most reach-in coolers, freezers, and prep tables use this style.
Push-in: similar to snap-in but with a stiffer bulb that friction-fits into a slot, common on older units.
Screw-in: a retainer strip holds the gasket flat against the door with screws, typical on some walk-in doors.
Compression: the gasket compresses between the door and frame with no channel at all, seen on some glass display cases.
Snap-in and push-in gaskets are where the outside-edge versus dart-to-dart confusion happens, since both dimensions exist on the same part.
Step 2: how to measure a refrigerator gasket (the gasket, not the door)
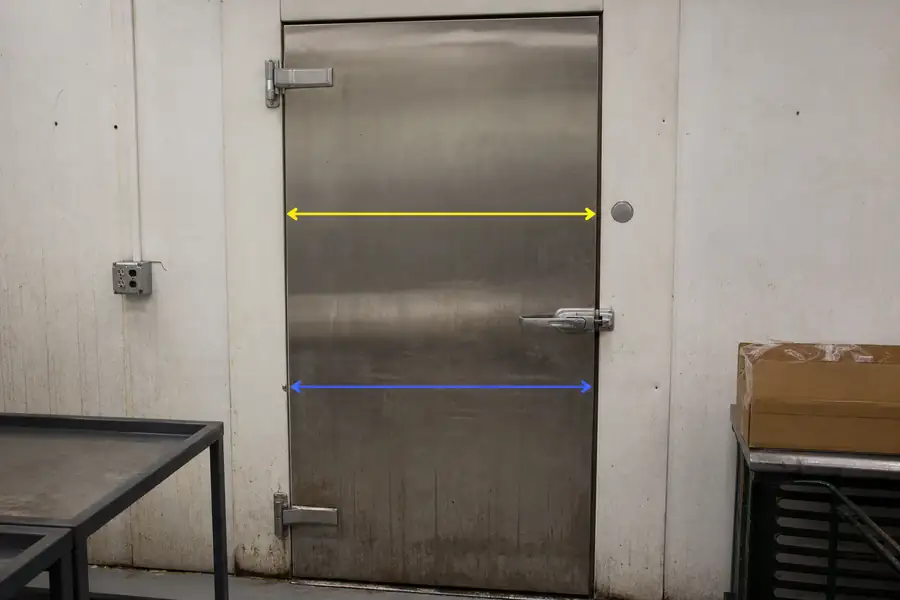
Measure the gasket while it's still mounted on the door, not the rough door opening. The opening is usually a half inch to an inch smaller than the gasket that seals it, and ordering to that smaller number is the fastest way to get a part that won't reach the frame.
Outside edge to outside edge
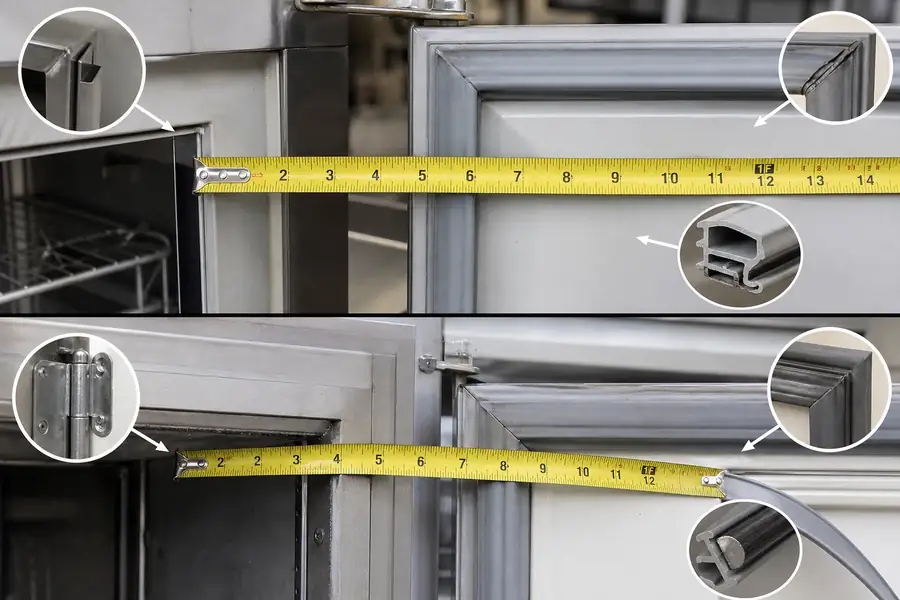
Outside edge to outside edge means running the tape from the farthest visible point of the gasket on one side to the same point on the other, across the whole width including both flexible lips. This is the convention most parts distributors, and brands like Traulsen and Turbo Air, use on their published size charts.
Dart to dart, and when a supplier means this instead
Dart to dart means measuring between the two barbed fins, called darts, that snap into the door's retaining channel, ignoring the folded-over outer edge entirely. True's own published gasket guidance uses this measurement on many reach-in and prep table models, so a True unit measured outside edge to outside edge can come back noticeably oversized.
If you're not sure which one a supplier wants, ask directly: Is that outside edge to outside edge, or dart to dart? A supplier who can't answer that in one sentence probably hasn't measured many commercial gaskets.
Method
What you measure
Common on
Outside edge to outside edge
Farthest point of gasket on each side, full width
Traulsen, Turbo Air, most distributor charts
Dart to dart
Distance between the two snap-in fins, ignoring the outer lip
Many True reach-ins and prep tables
Step 3: record the profile number or photograph the cross section
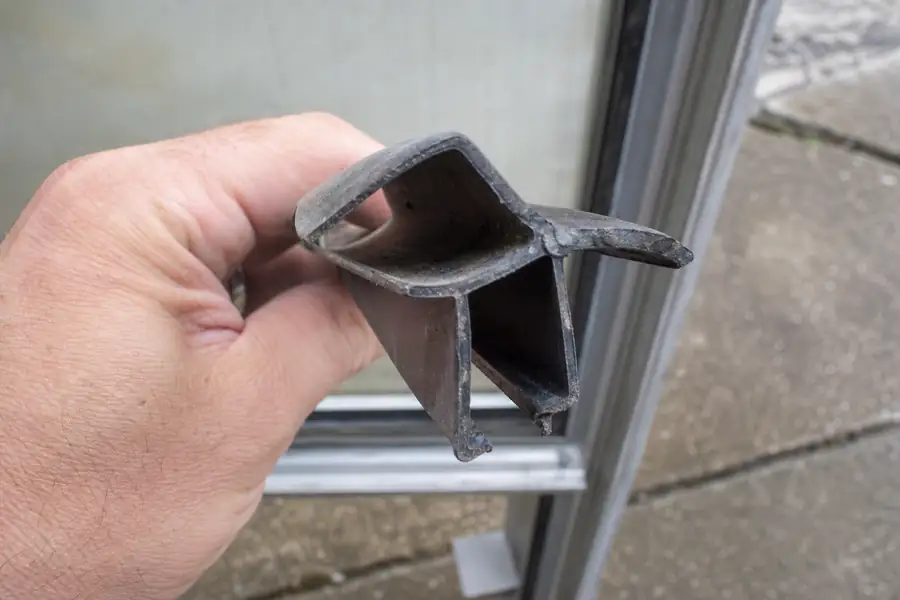
A profile number identifies the gasket's cross-sectional shape, meaning how it folds and where the bulb sits relative to the mounting fin. It's usually stamped or printed in small type on the inside face of the gasket.
If you can't find a stamped number, cut a one-inch section from a corner or scrap piece and photograph it standing on end next to a ruler. That cross-section photo tells a supplier more than a length measurement alone, since two gaskets can share the same outside dimensions but have completely different bulb shapes.
Step 4: check the corners and the mitre
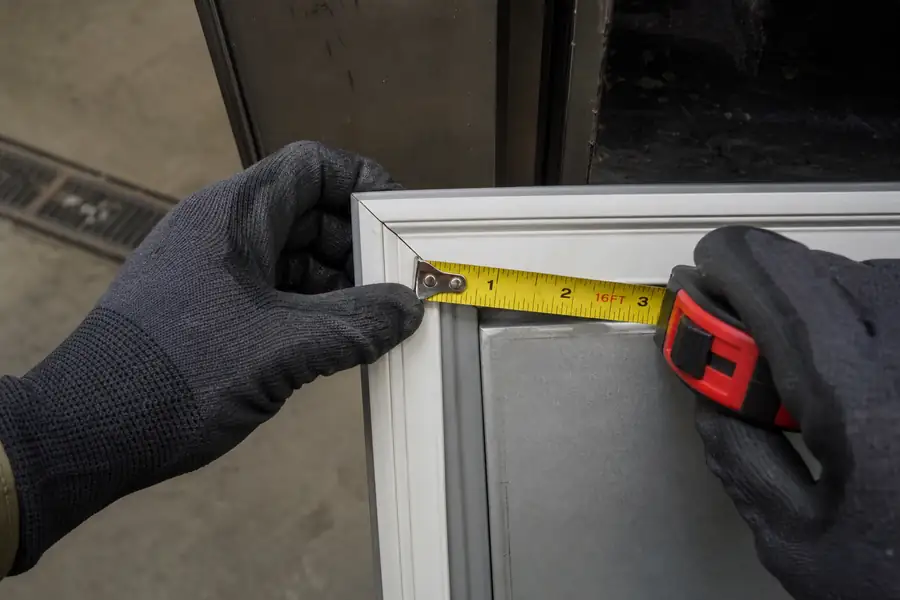
The mitre is the angled cut where two gasket lengths meet at a door corner, usually cut at 45 degrees so the seam sits flush rather than overlapping. A gasket ordered at the right length can still leak air if the corners were never checked.
Look for gapping, curling, or a corner pulled away from the door panel. If the mitres on your current gasket are cracked or separated, mention that when you order, since it usually means the whole run needs replacing rather than a patch at one corner.
The five mistakes that cause a wrong order
Measuring the door opening instead of the gasket itself
Mixing outside-edge and dart-to-dart numbers on the same order
Rounding to the nearest quarter inch instead of the nearest sixteenth
Guessing the mount type instead of checking snap-in versus screw-in
Skipping the corner check on a gasket already cracked at the mitre
When measuring will not get you a part
Measuring correctly still fails you when the equipment is discontinued and the exact profile is no longer manufactured. A Longmont cafe running a ten-year-old reach-in unit can measure the gasket perfectly and still find that no supplier lists a replacement, because the original profile was retired years ago.
That's a fabrication problem, not a measuring problem. The Gasketeers' custom and obsolete gasket fabrication service builds a new gasket from the exact cross section of the old one, so an obsolete model number doesn't mean the whole unit needs to be replaced.
Skip the tape measure: send photos instead
If measuring feels like guesswork, skip it. Photograph the open door, the data plate, and a close-up of one corner, then text those photos to (970) 507-8034. That's usually enough for The Gasketeers to identify the mount type and confirm the measurement before cutting anything.
You can also contact The Gasketeers directly with your unit's brand and model number, and we'll walk through which measurement your quote actually needs. For a closer look at the process end to end, see this gasket measuring walkthrough with photo references.
Frequently asked questions
How do you measure a commercial refrigerator gasket?
Measure the gasket while it's mounted on the door, running a tape from outside edge to outside edge for most snap-in and push-in seals, or dart to dart if the manufacturer's chart calls for it. Record the mount type and profile number if visible, and check both corners before placing an order.
What is dart to dart measurement?
Dart to dart measurement is the distance between the two flexible barbed fins on a snap-in gasket, measured from the inside of one dart to the inside of the other, ignoring the folded outer lip. True uses this convention on many published gasket size charts, which is why a gasket ordered outside edge to outside edge for a True unit can come back oversized.
Do you measure the gasket or the door?
You measure the gasket, not the door opening. The rough opening in the door panel is typically smaller than the gasket that seals it, so a measurement taken from the frame instead of the seal usually results in a part that's too small.
Can I use a universal gasket instead?
A universal gasket can work for some basic reach-in applications, but it rarely seals as well as a size-specific replacement because door channel depth, dart spacing, and corner mitres vary by brand and model. For equipment still in regular use, matching the OEM-spec fit or profile number gives a tighter, longer-lasting seal than a generic stock size.